If you spend your days deep in Google Ads, you already know the underlying frustration of in platform reporting. Those standard conversion columns only tell half the story. Your dashboard might boast a stellar ROAS or a plunging CPA, but standard attribution models (even data driven ones) are notorious for claiming credit for users who were likely going to convert anyway. When stakeholders start asking whether your campaigns are actually driving net new business or simply intercepting existing organic demand, pointing to the “conversions” column isn’t enough. You need concrete proof of causality, not just correlation.
This is where Google Ads Lift Studies become your most powerful analytical tool. By moving away from traditional attribution windows and running rigorously controlled experiments, lift studies automatically split your audience into a treatment group (exposed to your ads) and a control group (held back). Comparing the behavior of these two cohorts allows you to measure the true incremental impact of your campaigns. Can you imagine being able to show the conversions, searches, or brand affinity generated exclusively by your ad spend? I am going to take you through the tools to do just that!
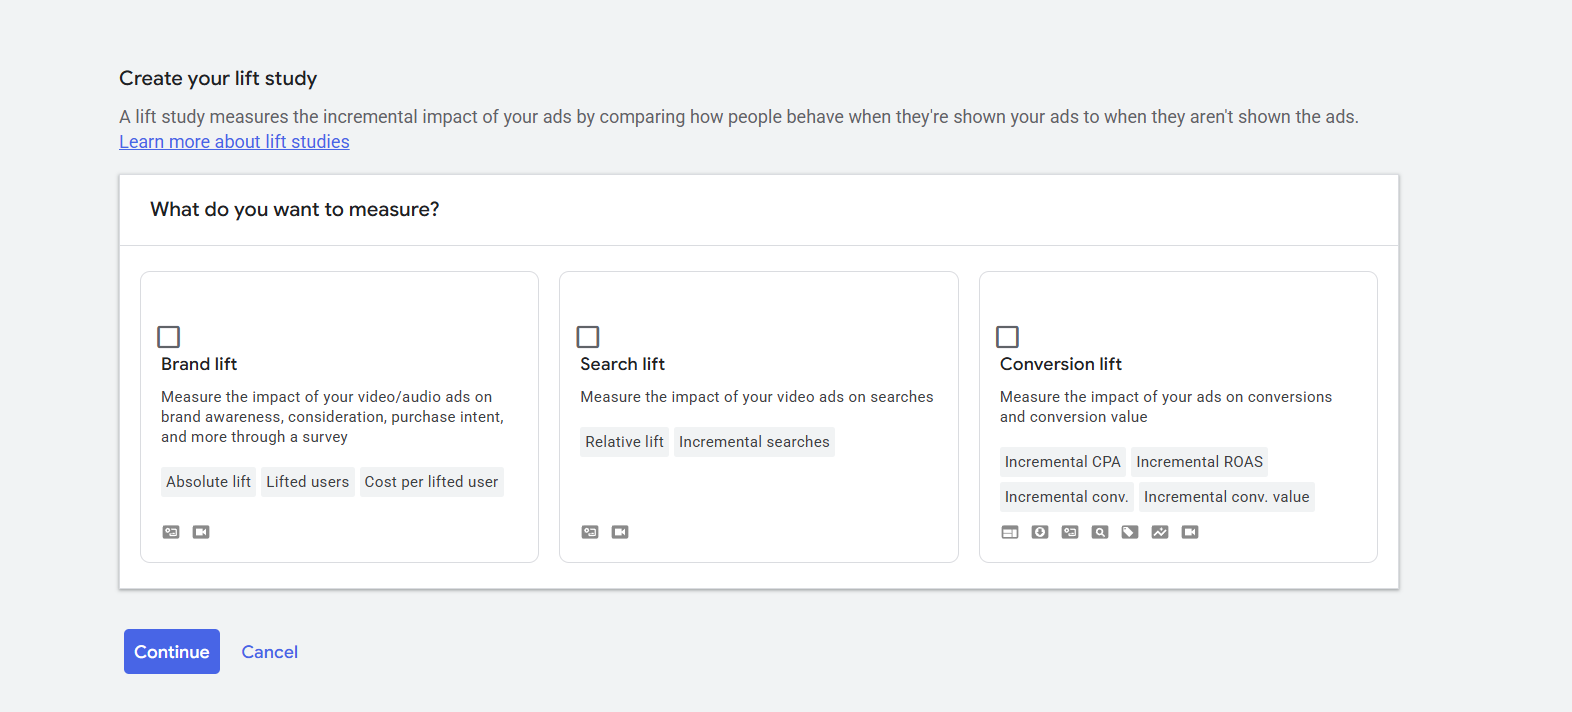
So what are they? Depending on your campaign goals, you can run four primary types of lift studies in Google Ads: Brand Lift, Search Lift, User-Based Conversion Lift, and Geography-Based Conversion Lift. Let’s look at what each study shows, why you may want to use it, and exactly how to set it up.
1. Brand Lift Studies
If you are running Video or Demand Gen campaigns, standard metrics like views and impressions won’t tell you if you actually changed a customer’s perception. Brand Lift studies solve this by intercepting users with brief surveys to measure how your ads influence their feelings toward your product.
What It Shows You
Brand Lift focuses heavily on upper funnel and mid funnel perception. It measures:
- Absolute Brand Lift: The difference in positive survey responses between the group that saw your ads and the group that didn’t. If the control group had a 20% positive response rate and the exposed group had a 40% positive response rate, your absolute lift is 20%.
- Cost per lifted user: The total cost of your campaign divided by the number of lifted users. This is your primary success metric because it factors in both the reach of your campaign and your budget efficiency.
- Lifted users (co-viewed): A specialized metric for connected TV (CTV) devices. When multiple people watch YouTube on a CTV device and view an ad together, it can lead to multiple lifted users for a single impression.
You can measure up to three of the following metrics per survey: Ad recall, Association (this is a new one), Awareness, Consideration, Favorability, and Purchase intent.
How to Set It Up
Note: Brand Lift is not automatically available for all accounts. You must contact your Google account representative to enable it.
- Prepare your campaign: Ensure you have an active Video or Demand Gen campaign. If you are using Demand Gen, prioritize video ads on YouTube (measurement won’t capture results from Gmail or Discover).
- Navigate to Lift Measurement: Go to your Goals menu, select Measurements, and click Lift measurement. Click the plus button and select Brand Lift.
- Define the survey: Enter the specific product or brand name you are promoting (e.g., “Google Pixel 4” instead of just “Pixel”). This will be the preferred answer in your survey.
- Configure questions and competitors: Select the survey language (which must match your ad’s language). Choose your target metrics (like Ad recall or Consideration). Enter up to three competitor product names to serve as alternative survey answers. You must utilize a multiple-answer format that includes an opt out option like “None of the above” at the bottom.
- Save and wait: Link the study to your campaign in the campaign settings under “Lift Measurement.” Surveys take up to 48 hours for approval. Once approved, the survey will begin running automatically as your campaign spends. Allow up to 10 days for the system to verify your budget eligibility. If you are a larger spend account, this happens within a day or so.
2. Search Lift Studies
Sometimes, a successful video ad doesn’t lead to an immediate click, but it does prompt the user to open a new tab and search for your brand. Search Lift measures the impact of your ads on users’ organic search behavior.
What It Shows You
Search Lift proves the impact of your media on intent driven actions. The study typically lasts for 28 days and requires a minimum threshold of impressions and search volume to protect user privacy.
- Relative Lift: The percentage increase in search volume caused by your ads. This is calculated as the absolute increase in searches divided by the baseline number of searches. A relative lift of 50% means users exposed to your ads were 50% more likely to search for your brand than those in the control group.
- Incremental searches (indexed) per impression: This illustrates whether impressions from a specific demographic slice (like age or gender) performed above or below your study’s average in driving searches. A score greater than 1 indicates above-average effectiveness.
How to Set It Up
- Navigate to Lift Measurement: In your Google Ads account, click the Goals icon, drop down to Measurements, and select Lift measurement.
- Create the study: Click the plus button, enter your specific product or brand name, and select Search Lift.
- Select campaigns: Choose the Video or Demand Gen campaigns you want to include.
- Configure search terms: This is the most critical step. Add 1 to 3 search terms to each group (you can create multiple groups).
Key insight: Do not solely rely on your main brand name for your search terms. If your brand is already widely known, it is mathematically difficult to detect a significant lift on the core brand term. Include specific product terms or campaign taglines to increase your chances of successfully detecting lift. So for example, let’s say you are a coffee brand. You could use, “{Brand Name} Reviews, {Brand Name} Coffee Pods, {Brand Name} + Best seller product. You get the picture!
3. User Based Conversion Lift
When your ultimate goal is driving sales, leads, or app installs, you need to know if your ad spend is generating net new business or just taking credit for conversions that would have happened anyway. User Based Conversion Lift isolates the true causal impact of your ads on actual bottom funnel conversions.
What It Shows You
Unlike standard reporting (which uses attribution windows like a 7 day click through), Conversion Lift intentionally ignores standard attribution rules.
- Incremental Conversions (Absolute Lift): The exact number of conversions you generated that wouldn’t have happened without the campaign.
- Incremental CPA: Your total campaign spend divided by your incremental conversions. If you spent $10,000 and drove 800 incremental conversions, your true incremental CPA is $12.50.
- Delayed incremental conversions: The study measures conversions during a specific timeframe, but Google’s models also analyze “conversion lag.” It projects the incremental conversions that occur after the study ends, which provides a much more accurate reflection of ROI for products with longer sales cycles.
How to Set It Up
Note: This feature also requires contacting your Google account rep. It is compatible with Display, Search, Shopping, Performance Max, App, Video, and Demand Gen campaigns.
- Check feasibility: Use the Conversion Lift feasibility tool (also known as Study Power) to estimate the certainty of your results based on your budget and campaign volume.
- Optimize tracking: Ensure your account tracks at least one compatible conversion action that fires unconditionally. For the best chance at detecting lift, Google recommends using conversion-based Smart Bidding strategies (like Target CPA or Target ROAS) and data-driven attribution.
- Opt your campaigns in: In the Lift Measurement dashboard, choose the specific campaigns you want to test. Campaigns can only be active in one study at a time.
- Review results: Once the study generates sufficient data, modify your columns in the Lift Measurement dashboard to add the “Conversion Lift” metrics.
4. Geography Based Conversion Lift
For massive accounts, omnichannel advertisers, or businesses that rely heavily on offline sales, user based tracking isn’t always enough due to cross device behavior and offline data limitations. Geography Based Conversion Lift (Your rep might refer to this as a Geo Experiment) solves this by splitting your audience not by user profiles, but by physical regions.
What It Shows You
Instead of tracking individual users, this methodology aggregates unattributed conversions into non overlapping geo regions. It isolates the differences between a baseline region and an exposed region.
- Google Marketing Areas (GMAs): The study uses a spectral clustering algorithm to group sub-country regions into experimental units called GMAs. This minimizes “contamination”, such as the risk of a user seeing an ad in a treatment city but converting in a control city.
- Incremental Return on Ad Spend (iROAS): This is the ultimate metric for geo based studies. An iROAS of 2 means that for every $1 invested in the tested channel, your business generated $2 in net new conversion value that otherwise wouldn’t have existed.
- Confidence interval: The estimated mathematical range in which your incremental estimates safely fall.
How to Set It Up
Geo based lift requires a significantly higher budget than user based lift to reach statistical significance. It is compatible with a wide range of conversion tags, including Google Ads tags, Firebase, Display & Video 360 Floodlight, and Bring Your Own Device (BYOD) offline conversions aggregated to the ZIP or city level.
- Verify targeting: Ensure your campaigns target a single country and have absolutely no specific location exclusions that would break the GMA algorithm.
- Check feasibility: The study must show a “High” feasibility status. Do not proceed with a low feasibility status, because the results are not statistically significant (re: meaningless!) You will need to increase your budget or consolidate campaigns to generate enough data.
- Define dates and conversions: Select the start and end dates for your study, and choose the specific conversions you want to test.
- Wait for the cooldown period: After the primary test concludes and campaigns return to business as usual, the system enters a cooldown phase where it continues collecting information to calculate iROAS. This is critical for businesses with longer conversion cycles.
Taking Action on Your Data
Google Ads lift studies require patience, budget, and structural discipline, but the payoff is immense (and can ease questions of doubt from the c-suite crowd.) By graduating from standard attribution to incrementality testing, you can stop guessing which campaigns are merely taking credit for existing demand. It will give you clear direction to invest heavily in the campaigns that actually create it. If you’d like help getting this on track for your business, book a call with me today!